To show index frame
Absolute Sweet Cindy
Soft cloth doll
Free pattern and instructions!
< Prev.    To the top.    Next >
This page have been already translated manually.

Arms and legs

Here, At first we compose arms and legs, then cover them with jersey cloth.
Arms and legs are composed of 5 kinds of parts. Lower legs, upper legs, lower arms, upper arms, and shoulder joints.
Parts of arm and leg (for right side)
All these parts are made of cotton Sheeting cloth, and the arms are covered with the cotton jersey cloth. The legs will be covered with the body cover later.
Except the shoulder joints, sewing methods of these parts are well alike. Sew a pair of parts for the right and the left.
Before you begin, set the stitch length on your sewing machine for tiny stitch.

Upper legs and upper arms

The sewing methods of upper arms and upper legs are alike.
Trace the edge of the pattern
Marked cloth
Place pattern pieces on the folded fabric and draw around with marker to mark fringe.
Place where side line was sewn
Pin and sew directly along the side line which shown in bold line on the pattern.

Marking a dart
Turn the fabric over and place turned pattern on unmarked side. Matching edges of the pattern to the seam lines of fabric. And mark a top line and darts on bottom.
Cutting
Cut out them, leaving a 1/4" seam allowance.
Pin and sew a dart
Open the top and bottom. fold in the line which labeled "FOLDING LINE" on the pattern. Sew two darts on the bottom.
Sew top
Sew both side of top approx. 1/4".
Sewing a ladder stitch
Pull and close opening
Turn right side through the opening, Using a chopstick to turn the corners in the top ends. Lightly stuff. Turn in the seam allowance and sew a ladder stitch to close the opening.
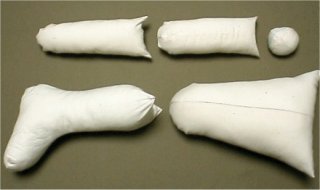
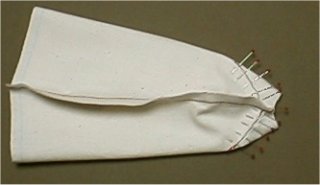
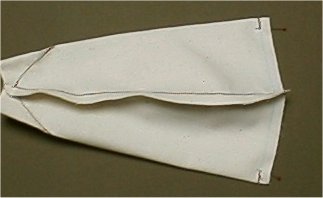
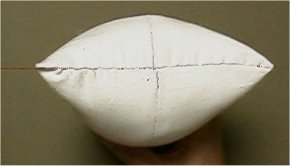
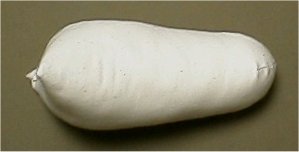
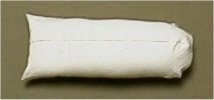
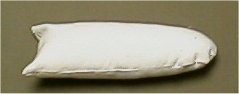
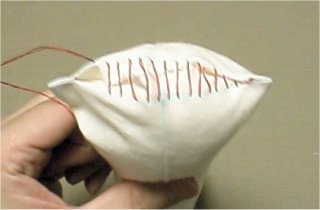
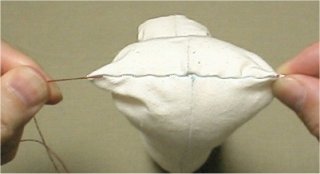
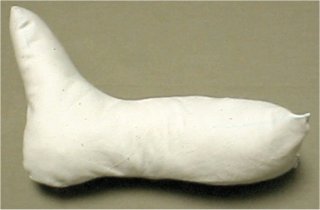
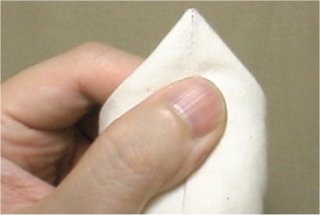
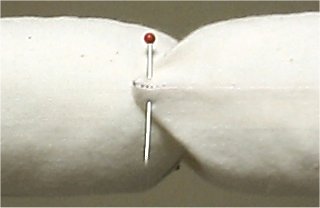
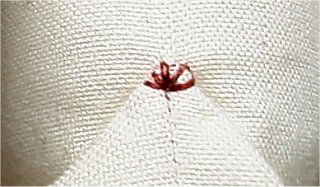
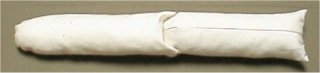
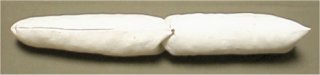
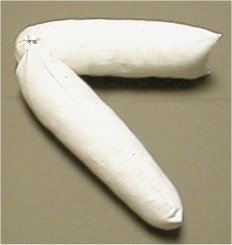
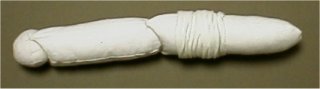
This part is a standard of softness for your Cindy. Other parts are stuffed compairing the softness to this part. So adjust the softness of this part carefully to increase or decrease the amount of filling to get your favorite softness. Since filling shrinks over long periods, stuff as firmly as you feel "a little firm". Do not stuff so firmly or joints will not be able to be bent. Since Sweet Cindy's joints are covered with cotton jersey cloth.

Completed upper leg
The lower side in the photograph becomes in front of the doll.
Upper arm
Sew upper arm the same way.

Lower arm

The way of makeing lower arm and upper arm is alike. But lower arm is easier to sew. At first place pattern pieces on folded fabric and draw around with a marker to mark fringe.

Sew around the part
Since lower arm have no dart, sew around the part along the bold line on the piece at once. Leave opening at the top of the part.

Stuffed lower arm
Cut out the part, leaving a 1/4" seam allowance. Turn right side through the opening, Using a chopstick to turn the corners in the top ends. Stuff as firmly as a upper leg. Turn in the seam allowance and sew a ladder stitch to close the opening.

Lower leg (foot)


Marking
Place pattern pieces on double layer of fabric and draw around with marker to mark fringe.

Sewn side lines
Pin and sew directly along the side line which shown in bold line on the pattern.

Marking
Turn the fabric over and place turned pattern on unmarked side. Matching edges of the pattern to the sewn lines of fabric. And mark two lines (A-B-C and D-E).

Cutting out
Cut out leaving a 1/4" seam allowance.
Marking folding lines
Mark two folding lines (B-F H-G) by eye measure.
Open the bottom end (Finger side) And fold H-G line on both pieces.

Marking finger tip
Place the foot tip pattern on the foot fabric, matching foot tip (K) to the sewing line (D-E). Mark finger tip line (J-K-L)

Sewn finger tip
Pin and sew just along the marked line. Cut foot tip fabric leaving 1/4 seam allowance. Clip the seam allowance at K, M, N and O. Be careful not to cut the thread.
Pin and sew top end

Sewing top end

Open the top end, and fold them in the line which labeled "FOLDING LINE" (B-F) on the pattern. Sew each side of top end approx. 1/4".

Stuffing

Turn right side through the opening, Using a chopstick to turn the corners in the top ends. Lightly stuff.
Ladder stitching
Pulling and securing
Turn in the seam allowance and sew a ladder stitch to close the opening.

Finished foot

Sew more one foot

Sewing way of other side of foot is alike already sewn one. But mark the foot tip line using reversed pattern.

Stuffing

Attach these feet to the upper legs, referring Attaching arms above-mentioned.

Shoulder joints

Shoulder joint is fabric ball stuffed with fiber.

Marking
Place pattern pieces on fabric and draw around with marker to mark outline.
Cut out
Mark center line of darts. Then cut out leaving 1/4" sewing allowance.

Fold and sew two darts.
Sewn two darts

Sew more two darts.
Sewn more two darts
All 4 darts are sewn
Repeat this process to make four shoulder joint piece.
Sewn around
Place two shoulder joint piece right sides facing, matching each darts and raw edges. Pin and sew the 3/4 of the edge. leaving open 1/4 for turning.
Turned right side out
Using a chopstick, Turn right side out through the opening. Stuff as firmly as you can to make it a fabric ball.

Attaching arms


Forming a triangle
There are 2 corners in the top ends of the lower arms labeled "B" on the pattern. Pull each corners and form the tip of them like triangles, To fit them to the bottom of upper arm.

Pinned
Place the tip to the bottom of upper arm at the "X" (labeled "B"), and pin.
Sewn
Making several stitch sew the pinned part together, and tie off.

Side view of the arm
Front view of the arm
Bending the joint
Repeat this for each corner of lower arms and lower legs to joint them.

Sew an arm and shoulder joint
There are 2 corners in the top ends of the upper arma labeled "A" on the pattern. Pull each corners and form the tip of them like triangles, To fit them to the shouder joint. Pin and sew top end of the upper arm to the shoulder joint like upper and lower arm.

Attacing legs

Sewn upper and lower leg
There are 2 corners in the top ends of the lower leg labeled "B" on the pattern. Pull each corners and form the tip of them like triangles, To fit them to the bottom of upper leg. Sew together like upper and lower arms.
Since upper legs is not symmetric figure, so be carefull direction of upper legs (front or back).

Covering arm

Arms are covered with the cotton jersey cloth. Use the expandable direction of jersey cloth for the long direction of the are cover.
When your jersey cloth have smoother surface than another face, use the smoother surfece for the right side.
Place arm cover pattern on the folded jersey cloth
Folding jersey cloth right side facing, placing arm cover pattern on the cloth, matching the line labeled FOLDING LINE on the pattern to the folding portion of the fabric, draw around the pattern to mark fringe. Marking side will become wrong side of arm cover.
Pin and sew along the marked line
Setting the stitch length on your sewing machine for middle stitch, pin and sew along the marked line.
Trim excess fabric
Cut off excess fabric leaving 1/4" sewing allowance.
Work the fray-stopper and trim allowance
Work fray-stopper to the seam allowance at the tip of the arm cover. After it dryies up, trim the excess portion of the seam allowance to left 1/8" margin.
Covering tip of the arm
Turn arm cover right side out. Matching seam line of the arm cover with A-B line (back side) of the upper arm, Cover the tip of the arm with arm cover the same way as drawing stockings on. Be carefuly not to left space between tip of arm and arm cover.
stuff the elbow
covered arm
Make a ball with filling approx. 1.5 inches in diameter. putting the filling ball on the out side of elbow joint, cover the elbow portion. After adjusting the position of ball just on the joint, cover whole arm with the arm cover.
Sew close top end of the cover
Sew close the top end of the arm cover like an end of a sausage.
Trim excess fiber
Trim excess portion of seam allowance leaving approx. 1/8 inch margin . Work fray-stopper a little.
Covered arm

    If it takes your fancy, you may place a link to this page without any notice to Doku. Would you like button picture below?

    About DOKU

      EMAIL (doku@newon.org)

      The "DOKU" does not mean a doctor. "DOKU" originates in the Japanese word "DOKUTOKU", and it means unique and original.
      These pages are originally written in Japanese, and translated into English. Original Japanese pages are here.