To show index frame
Absolute Sweet Cindy
Soft cloth doll
Free pattern and instructions!
< Prev.    To the top.    Next >
This page have been already translated manually.
Under correction.

Body

Here, at first we sew and stuff bodies then attach legs on it. Body is composed of two pillow-like body parts. One body part is composed of two fabric pieces, front body piece and back body piece.

Back body piece

Cut two same back body piece from cotton sheeting cloth.
Marking fringe
Placing pattern piece on the fabric, draw around the pattern to make fringe.
To mark easy, fix the pattern with paper weights etc. I used small magnets in picture above.

Cutting
Cut fabric along the marked line.

Place a corrugated paper sheet (used for carton box) on your working table. And check that the needle of your drawing pin is shorter than the thickness of the sheet. If long, Place more sheet so that your table may not be damaged.
Marking the right side
Place the fabric back body piece on the pattern matching the edges of the pattern to the edges of the fabric. And stab the drawing-pins aslant and half of needle. You can see the lines drawn on the pattern through the fabric. Trace all the lines on the fabric. But dart lines are not need to do for the right side. In the picture above, magnets are used to hold fabric.
Marking the wrong side
Remove drawing pin and turn the fabric over on the pattern, matching the edges and pin again. This Is the wrong side of fabric. Trace the sewing line around and 7 dart lines (and center lines of darts). In the picture above, magnets are used to fix fabric.
Sewn dart
Folding the center line of each darts, pin and sew the darts.
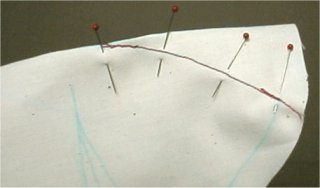
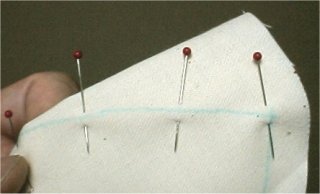
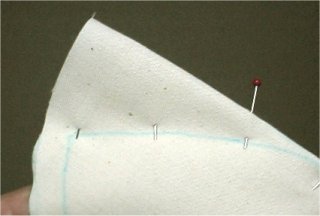
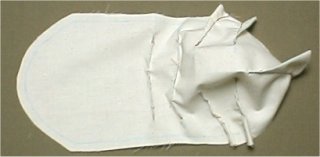
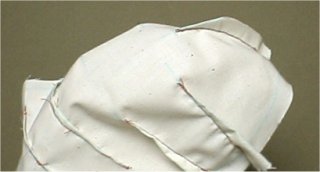
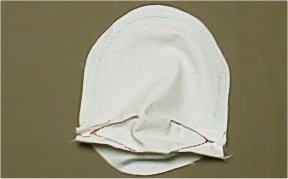
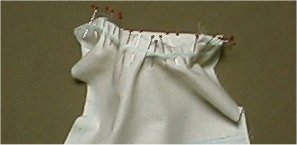
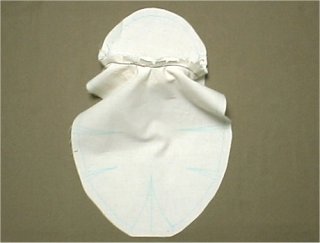
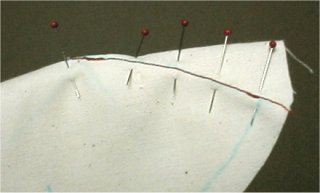
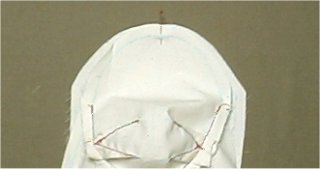
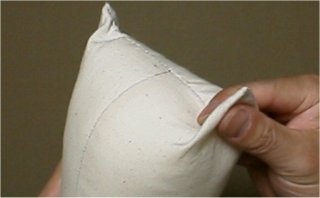
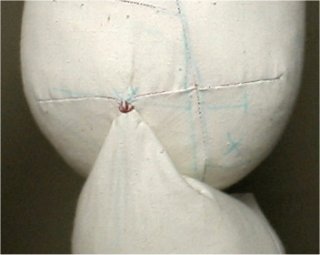
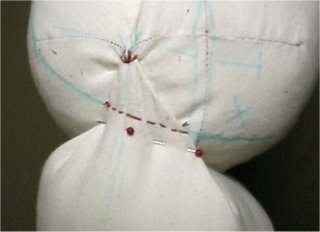
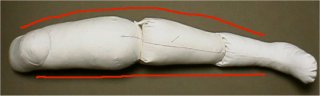
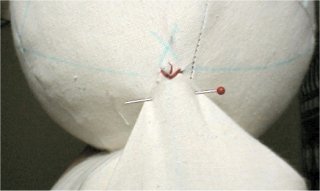
How to sew darts with accuracy
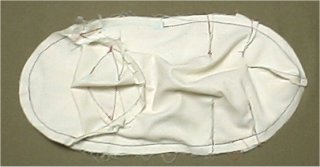
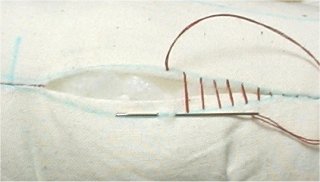
Pin along the dart line
Confirm pins are on the dart line on the rear face
Sewing darts with accuracy, we can get smooth body. To sew darts with accuracy, Pin along the dart line, and looking them from backside, confirm the dart lines of both faces are matched correctly.

All datrs are sewn
Sew all seven darts on back body piece.
Trimming excess fabric
Trim excess fabric of the largest dart at the bottom.

Sew more one the same back body piece.

Front body piece

Make 2 pieces of this for the right and left body. The ways of making front and back body pieces are alike. But to make front body piece, we need to seam two pieces (upper front body and lower front body) together.
Front body pieces (upper and lower)
Using pattern, cut front body pieces. trace all lines on the pattern on the both side of the fabric pieces.

Sew four darts
Sew four darts on the front body from wrong side.

Right side facing, match bottom line of upper front body piece with top line of lower body piece. (The lines to match are shown on the pattern as line  C-E-D-B)

Pin from center to right
At first, pin at the center then pin to right along the line C-E-D-B.


Pin from center to left
Then pin to center to left along the line C-E-D-B.
Clip seam allowance
To make sewing easy, clip the seam allowance at E-D line several.

Sew along the line
Sew along the line C-E-D-B


Sewn dart
Folding the center line of each dart, pin and sew the dart.
Completed front body piece
Sew all nine darts to complete front body piece.
Turn right side out
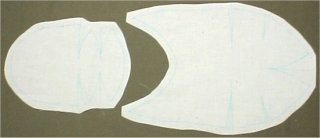
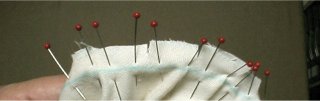
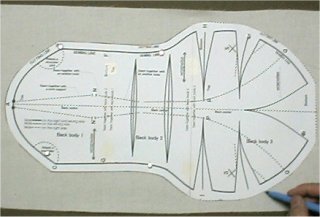
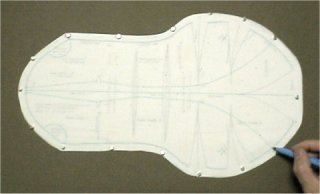
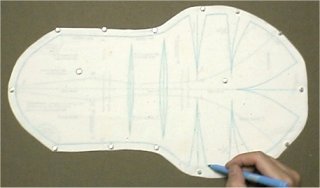
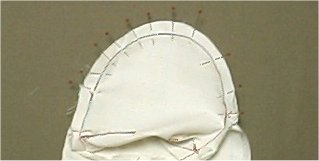
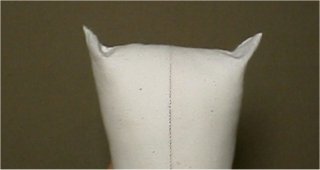
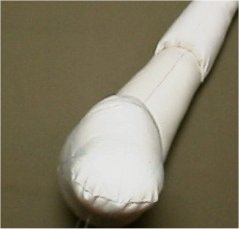
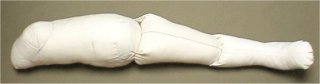
Why such a lot of darts?
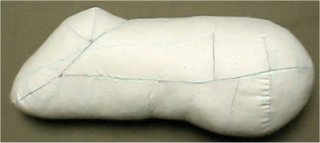
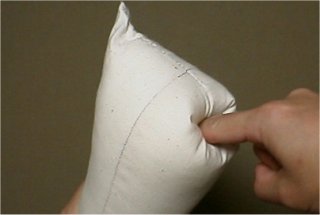
She keeps her form not by the shape of filled fiber but to balance the tension of fabric and pressure of filled fiber. So fabric tension needed to keep evenly by the darts. Since she have to keep her body soft and have to keep her form for long periods. 

The same way, sew another front body piece.

Sew together front and back body pieces and stuff.

Two body pieces (right and left) have the same form. but the openings (to stuff) are located to different side.

Pin top center of the body.
Right side facing, matching "A" point (shown on the pattern) together, place front body piece and back body piece together, and pin at "A".

Pin and sew A-B and A-C.
Carefully matching each sewing lines drawn on the right side, Pin A to B and A to C. And sew A to B and A to C along the sewing line.
Sew around the body leaving opening.
Pin and sew around the body along the line B-F-H-I-G-C leaving opening as shown in the pattern.

Make right side out through the opening
Right side out through the opening.
Close opening using ladder stitch
Stuff as softly as upper leg. Close opening using ladder stitch.

Stuffed body

Attach legs on the body

There are two tips on the top end of the upper leg (labeled "K" on the pattern). We sew this tips on two "X" marks on the body. But there are four "X" marks (labeled S on the pattern) on the bottom portion of the body. So there are four "X" marks but we apply only two "X" marks. So, reading instructions below, carefully pick out two correct "X" marks from four "X" marks to sew a leg on.
At first we attach left legs under the left body. (In this instruction left DON'T means left side for you, left means left side for Cindy.) Left body has opening (to staff) in it's left side.

Push the tip with yor finger
Pull it and form a tip.
To carry away filling in the tip, at first push the tip (on the top of the upper leg) in to the upper leg. then pull it out agein.
carry away the filling in the tips
In a similar way carry away filling in another tip.
Sew tips to the body
At first pick out "X" mark, labeled "S" in the right bottom portion of back body piece of the left body. The mark is located inner back portion of left body. Then pin and sew right tip of left upper leg on the picked out "X" mark.

Pin other tip to the body
Pick out "X" mark labeled "S" in the left bottom portion of front body piece of the left body. The mark is located outer front portion of left body. Then pin left tip of left upper leg on the picked out "X" mark. (hereinafter referred to as OUTER POINT)

Angle of leg
Sew along the line.
Put left body and leg on the table right side up. Bend legs a little as shown in the picture above. Pin and sew along the line P-Q-R.

Adjustment of OUTER POINT
Put left body and leg on the table front side up. Adjusting OUTER POINT a little up end down, from right side line of body and legs (inner side line) straight as shown in above picture.

Sew OUTER POINT
Then sew OUTER POINT on the body.
Direction of foot
When erect the left body on the table (make the leg level), if look from up, the leg was attached a little clockwise rotated as shown in the picture.
body and leg
When place the leg frontal, the body face to a little left.
The right leg is sewn.
In the same way (right and left are reversed in instructions), sew right leg on the right body.

    If you like, you can place a link to this page. Use button picture below.

    About DOKU

      EMAIL (doku@newon.org)

      The "DOKU" does not mean a doctor. "DOKU" originates in the Japanese word "DOKUTOKU", and it means unique and original.
      These pages are originally written in Japanese, and translated into English. Original Japanese pages are here.